


Happy Spring, friends! I find that Mother’s Day always sneaks up on me… how about you? I’ve got you covered with this simple but special Mother’s Day card tutorial! This card is quick to make, and it’s easy to substitute for whatever you have on hand! Let’s check it out! (Affiliate links may be used at no cost to you.)
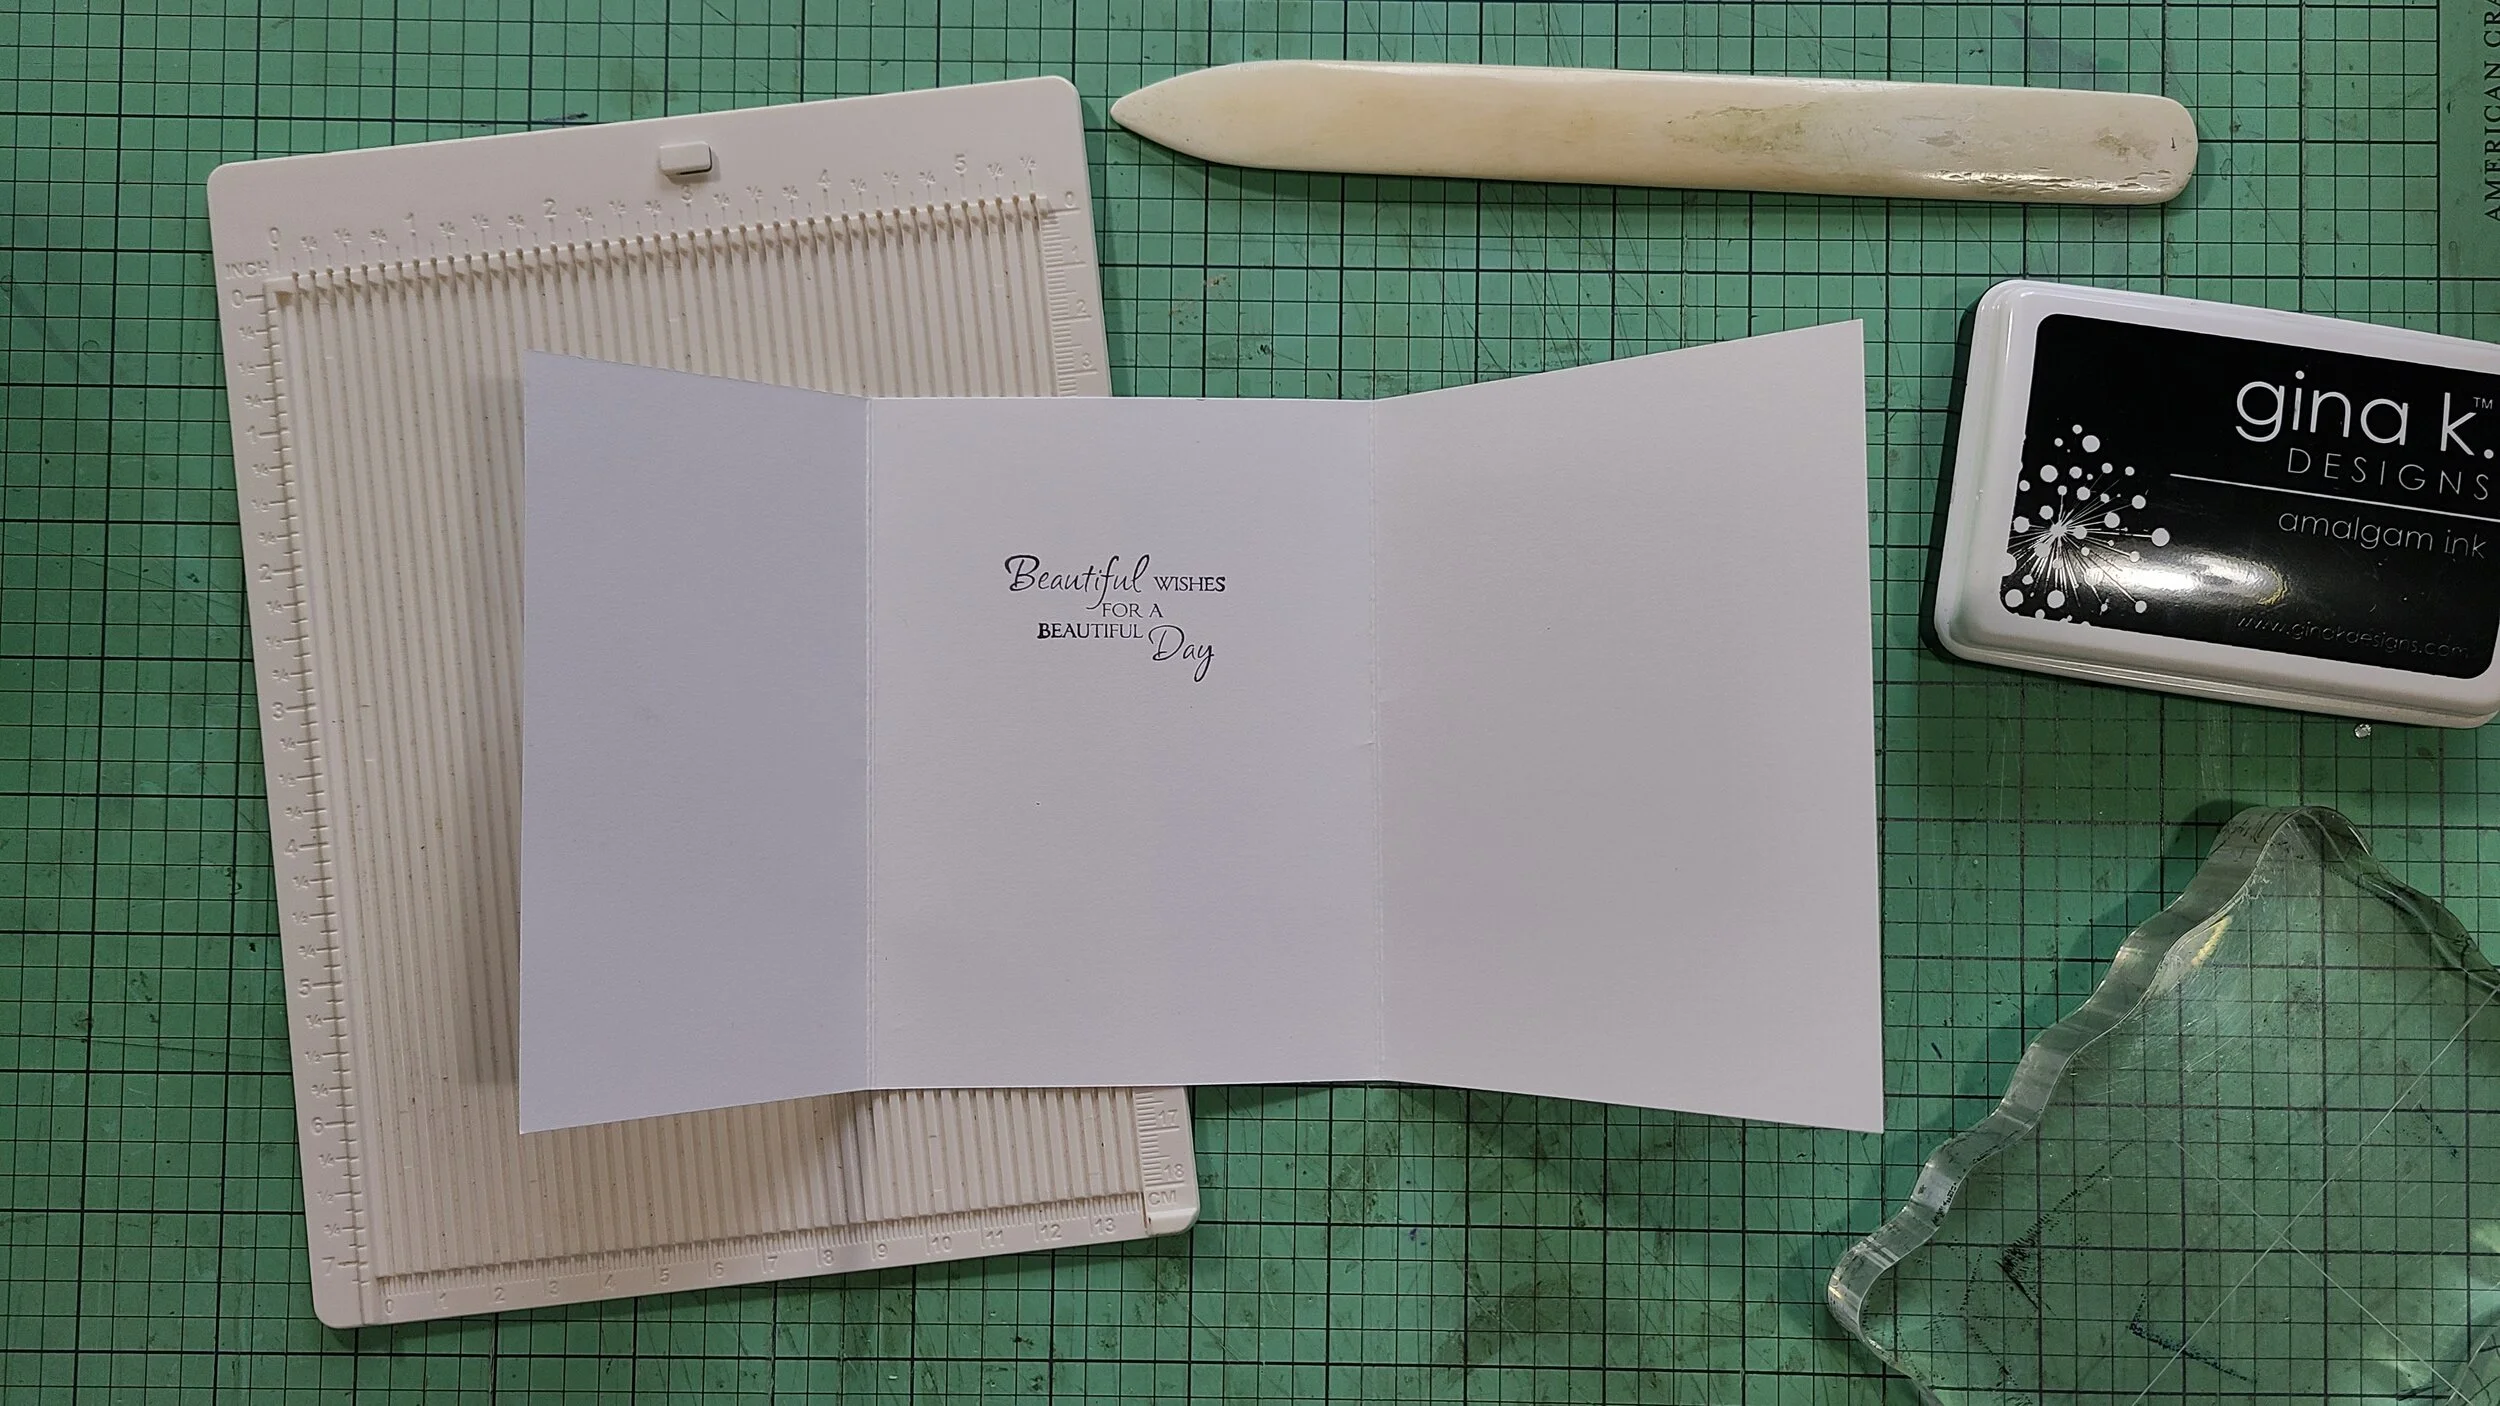
Start with a 5”x9 3/4” panel of white cardstock, 80lb or more works well. Score at 2 1/2” and 6 1/8”, giving you a large panel to fold left toward the center panel, and a small panel to fold right to be the top layer of the card. Use black ink to stamp a sentiment inside, centered near the top of the center panel. I used Beautiful Wishes by Rubbernecker with Gina K Amalgam ink.

Fold the large right panel towards the center. Trim a 3 1/2” x 4 7/8” panel of patterned paper and adhere to this panel.

Fold the small left panel towards the center. Trim a 2 3/8” x 4 7/8” panel of patterned paper and adhere to this panel. I really love how the mint and peach look together!

The next steps are fun! Die cutting makes this card super easy. Stamp a circular image on your preferred coloring medium paper. I used the watering can and flower pot image from Art Impressions Gardening Circlet - any of the Circlets would be wonderful! I stamped it on watercolor paper, using that same Gina K Amalgam ink, which is perfect for any coloring method.
Die cut your image with a circle die. Die cut a peach mat with a slightly larger circle die. I used the 2 1/4” and 2 5/8” dies from the Art Impressions Double Stitched Circle Dies.
Stamp a Mother’s Day sentiment on silver cardstock and trim or die cut into a flag shape - this Ai Double Stitched Flag Set works well!


The next step is to color your image! This small image is great to color because it’s pretty quick! And watercolor makes it even quicker, I think. I used some watercolor pencils to lay down some color, and a water brush to help blend it out. With watercolor, I’m careful to leave a little bit of white space to create highlights, especially in the center of the watering can and flower pots to make them look more 3-dimentional. I kept my card base handy so I could match some of the colors, like peach.


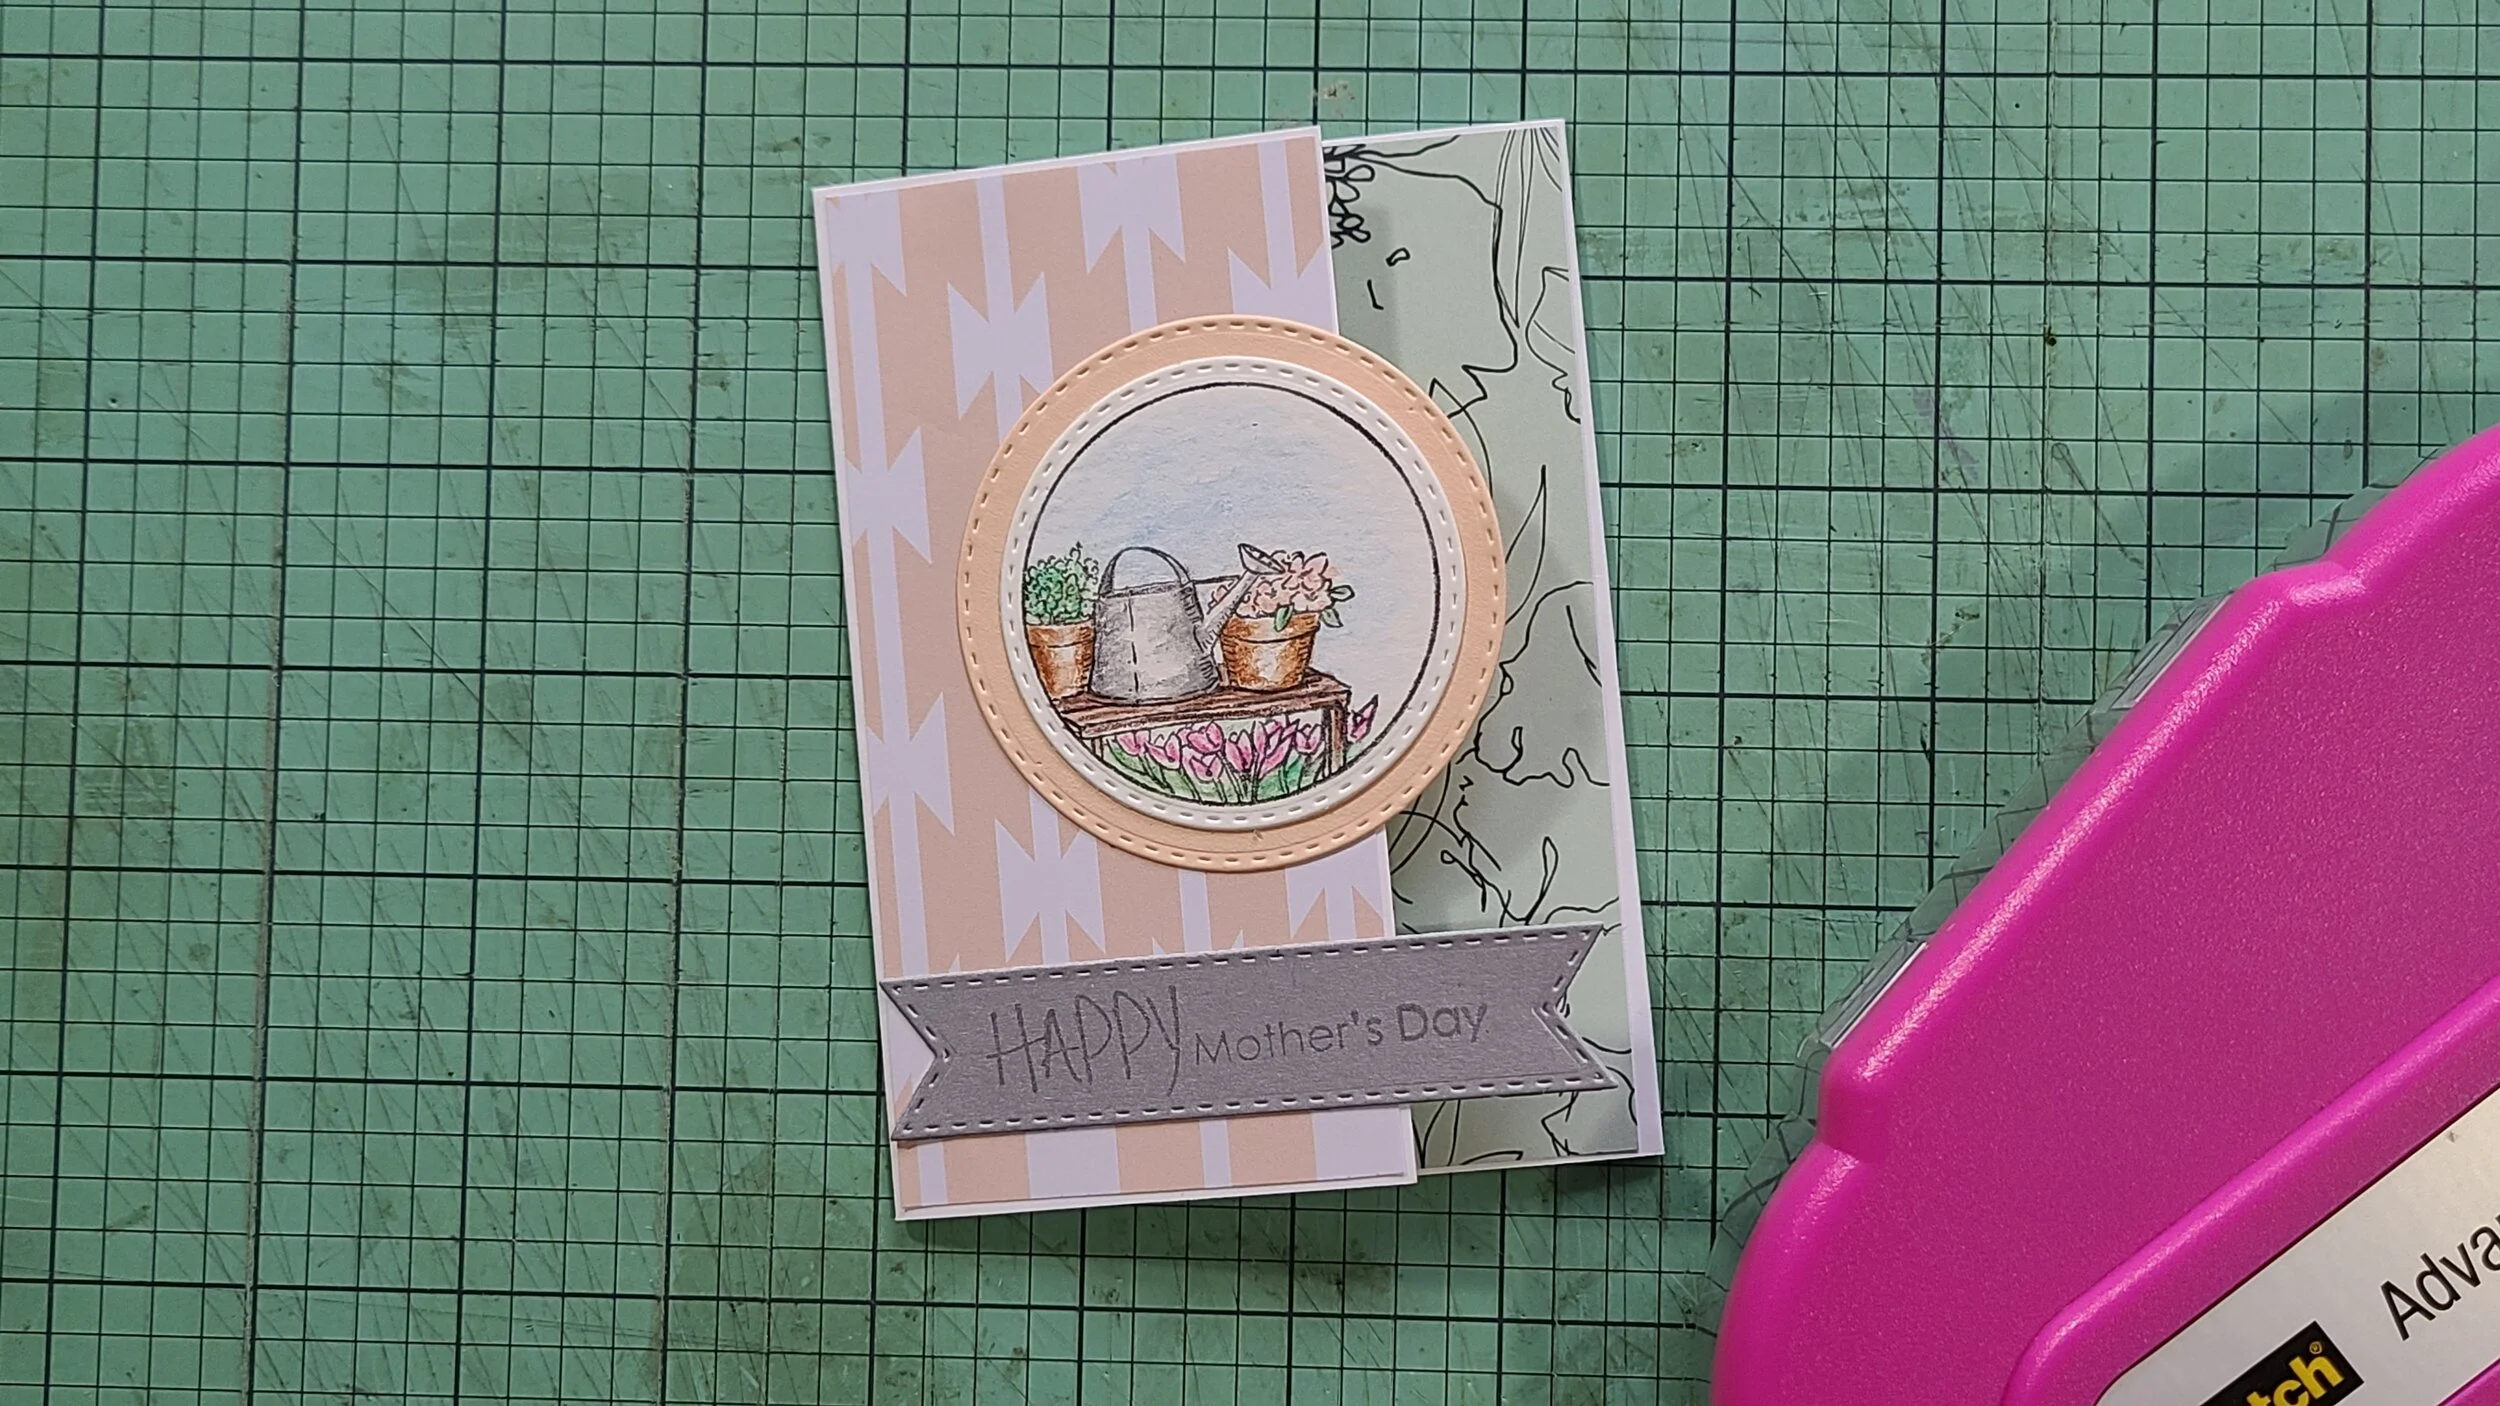
Adhere your stamped image to the peach circle. Then, careful to put adhesive on just half of the backside, adhere the peach circle to the top small panel so that it hangs over the edge. Do the same with the silver sentiment strip.

Take a length of small ribbon (I used 1/8” grosgrain turquoise ribbon) and tie a little bow, trimming the ends as needed. Use a dot of liquid glue to attach it to the bottom of the circle.
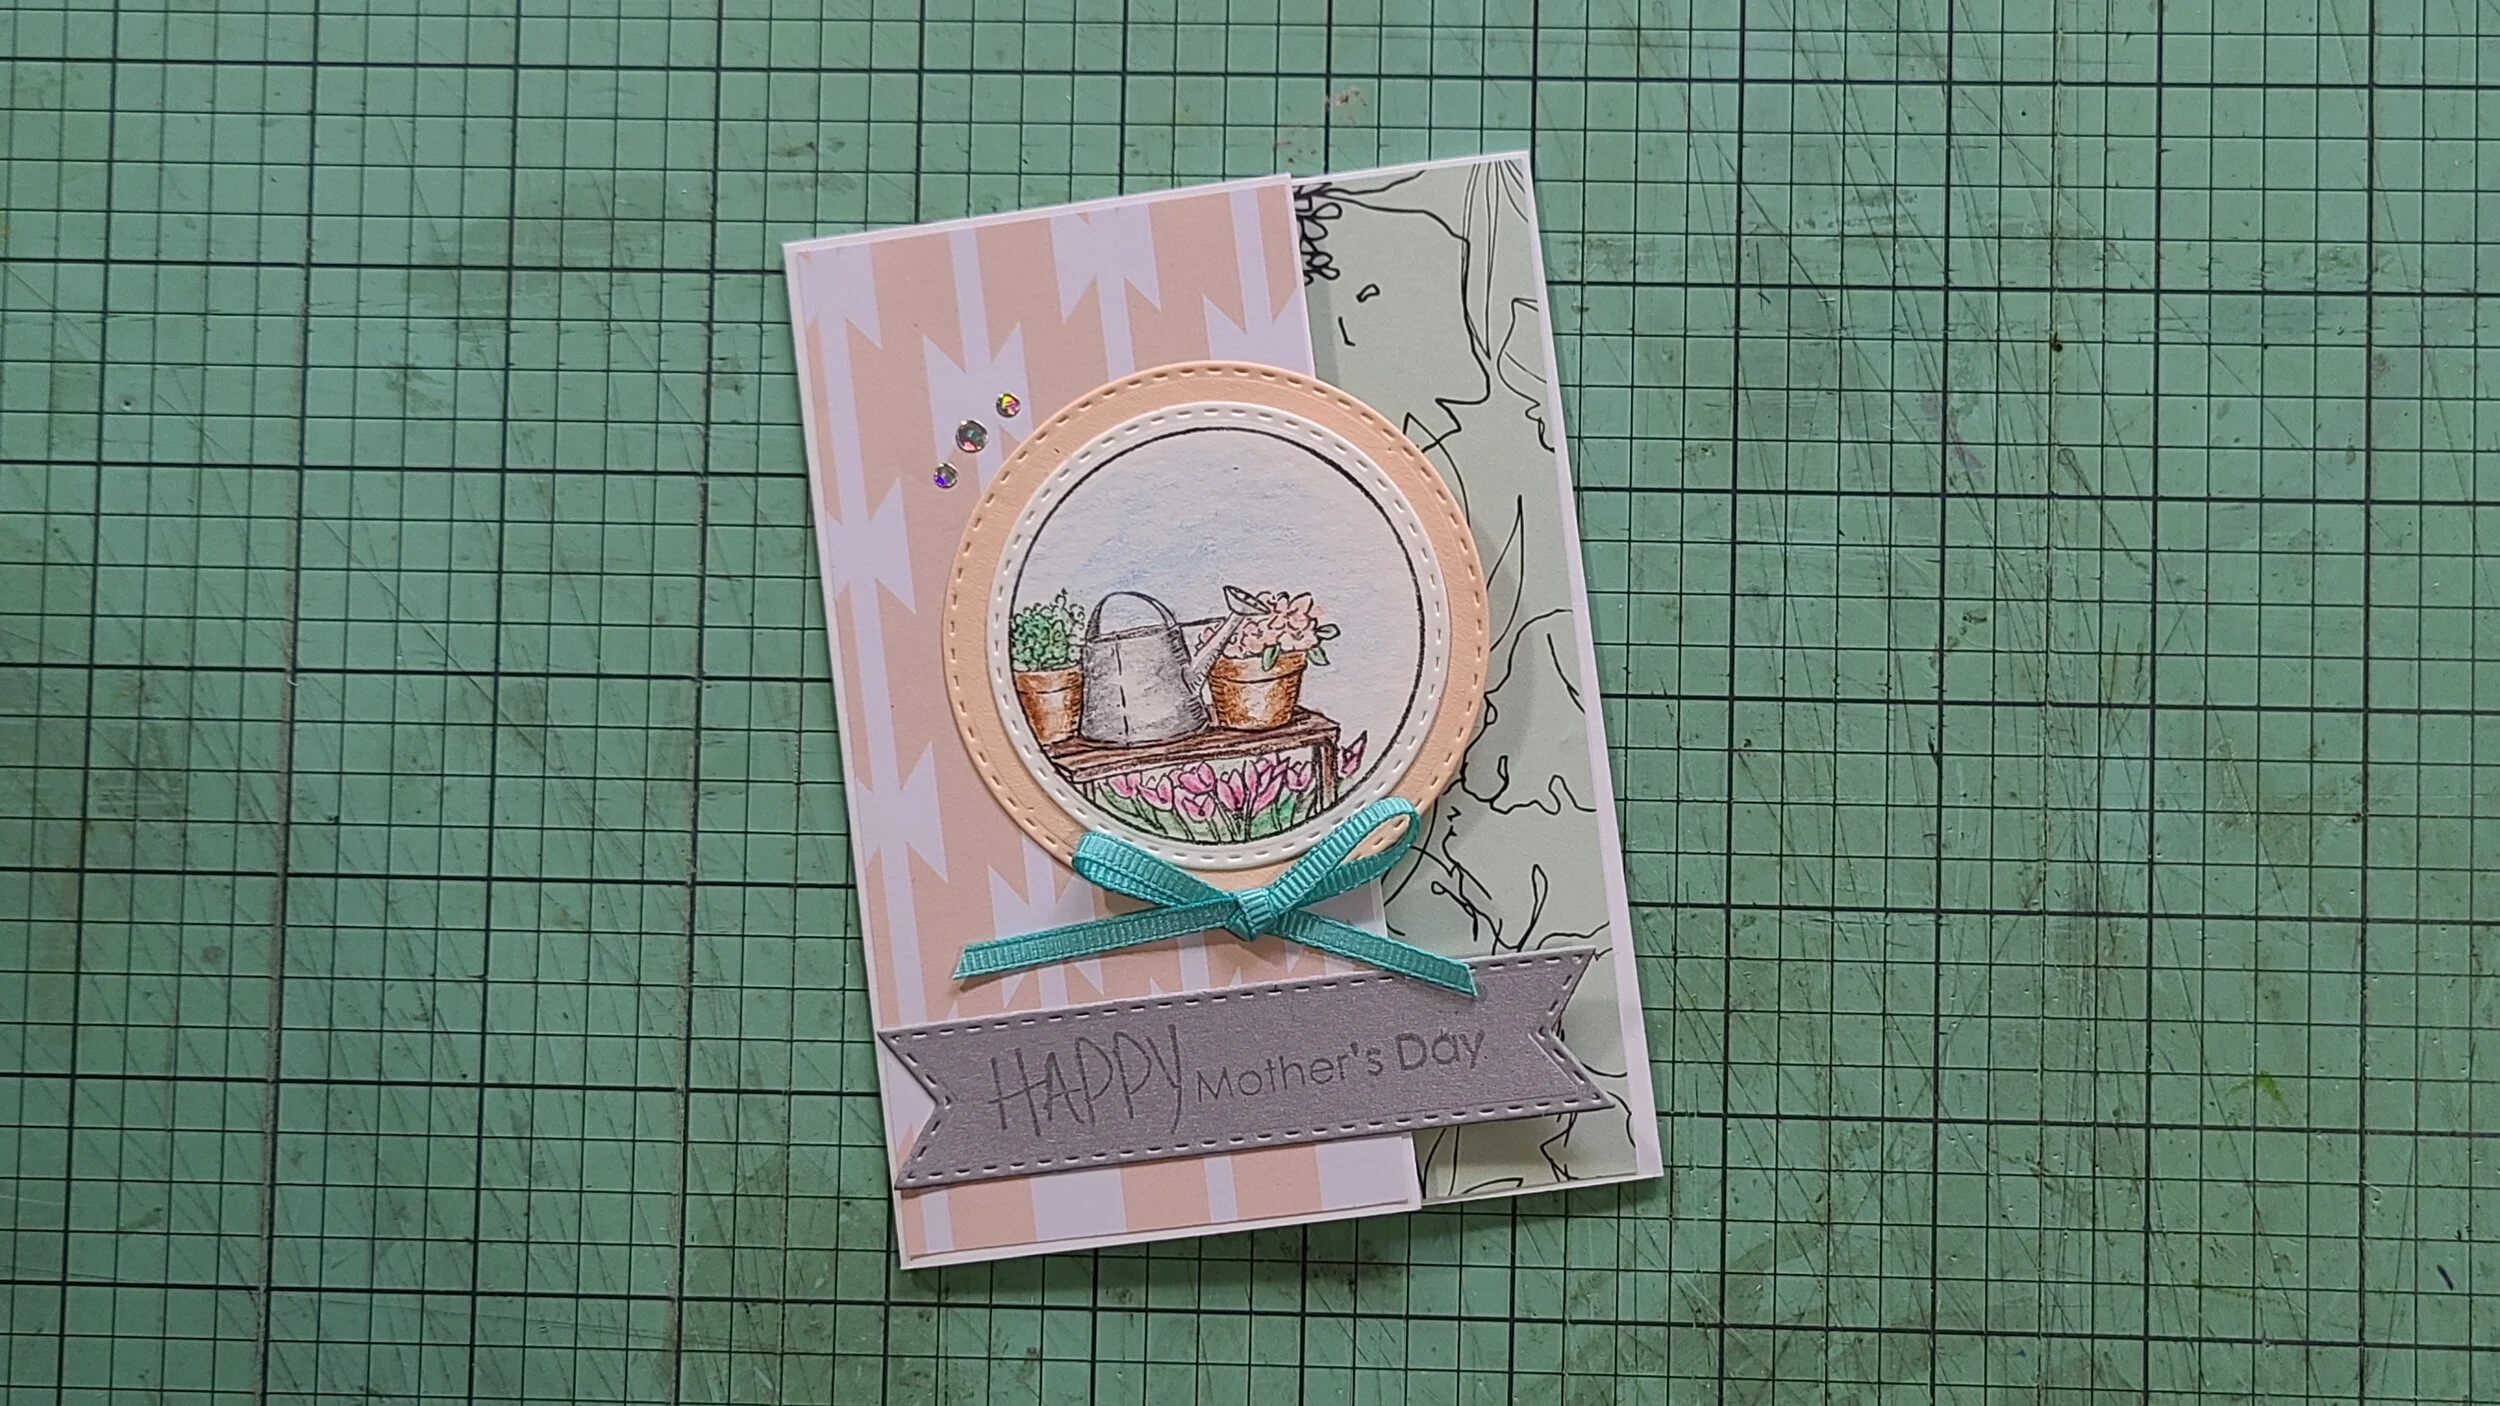


For the final touch, some little silver dot stickers are really sweet. These stickers are really small, so I used some craft tweezers to help place them exactly where I wanted them. I used three to follow the top left curve of the circle, and sprinkled a few inside. I find grouping 2-3 together about 3 times gives a balanced look. A silver envelope is pairs perfectly, and lets Mom know something truly special is inside!
I hope you enjoyed this tutorial! Remember to click the links to view the supplies I used, but this card is super easy to make with any kinds of papers, stamps, and embellishments you have on hand.
Have a wonderful day!